
Your Custom Text Here
Earth Oven Tragedy
I’m not much of a recipe person. Instead of teaspoons and tablespoons, my measurement system relies heavily on “dashes of this” or “hints of that.” I am comfortable with this system because it usually doesn’t fail me. In this case, this system completely failed me. In this case, I am Mayhem from the All State commercials, wanting to cut down a large tree. I watched two minutes of a 9-minute, DIY, meat pit video then went and "rented the biggest chainsaw I could find".
Yeah, it only gets worse from here, but hopefully someone will read this and propel himself to give it a better shot.
In the last weeks before I departed for New York, I caught wind of a new Netflix series entitled “Chef’s Table.” If you love food, I highly recommend you checking out this series. I absolutely love the show. Can’t wait for Season 2. My favorite episode depicted the life of the famous Argentinean chef, Francis Mallman. He spends most his time cooking outdoors in rural Patagonia where he also owns his own island
Yeah, crazy right?
In the Mallman episode, Francis and his band of gypsies-chefs constructed a meat pit by digging a hole in the ground, building a fire, wrapping some food up in leaves, and then burying it all in the hole. This style of cooking is known as “Curanto” in Patagonia. Mallman explained people all over the world have been cooking in pits or "earth ovens" for over 12,000 years. He also said the taste of the meat and vegetables from a pit were amazing… and he also mentioned something about,
“...potatoes you could suck through a straw.”
If people 12,000 years ago were doing pits and making all this amazing food like "potatoes that you can suck through a straw", then I sure as hell should be able to do the same now in the 21st century... I just really wanted some of those potatoes.
Again, I recruited my younger brother, Sam, who was still home on Christmas break. Compared to Mallman’s band of gypsy-chefs, we were a little outmanned and inexperienced, but hey, I had watched an entire two minutes of the nine-minute, DIY video.
After trip to the local meat market, we had all the food staples we would need: 1 Boston butt (commercially raised), half dozen potatoes, half dozen yams, and four onions. I had also thawed out the second and last Boston butt from New York. (remember it was free-range pork) Comparing the two pork butts yielded a large difference, not only in price per pound, but also in appearance. The meat pit would be my personal test to see which pork really was the best.
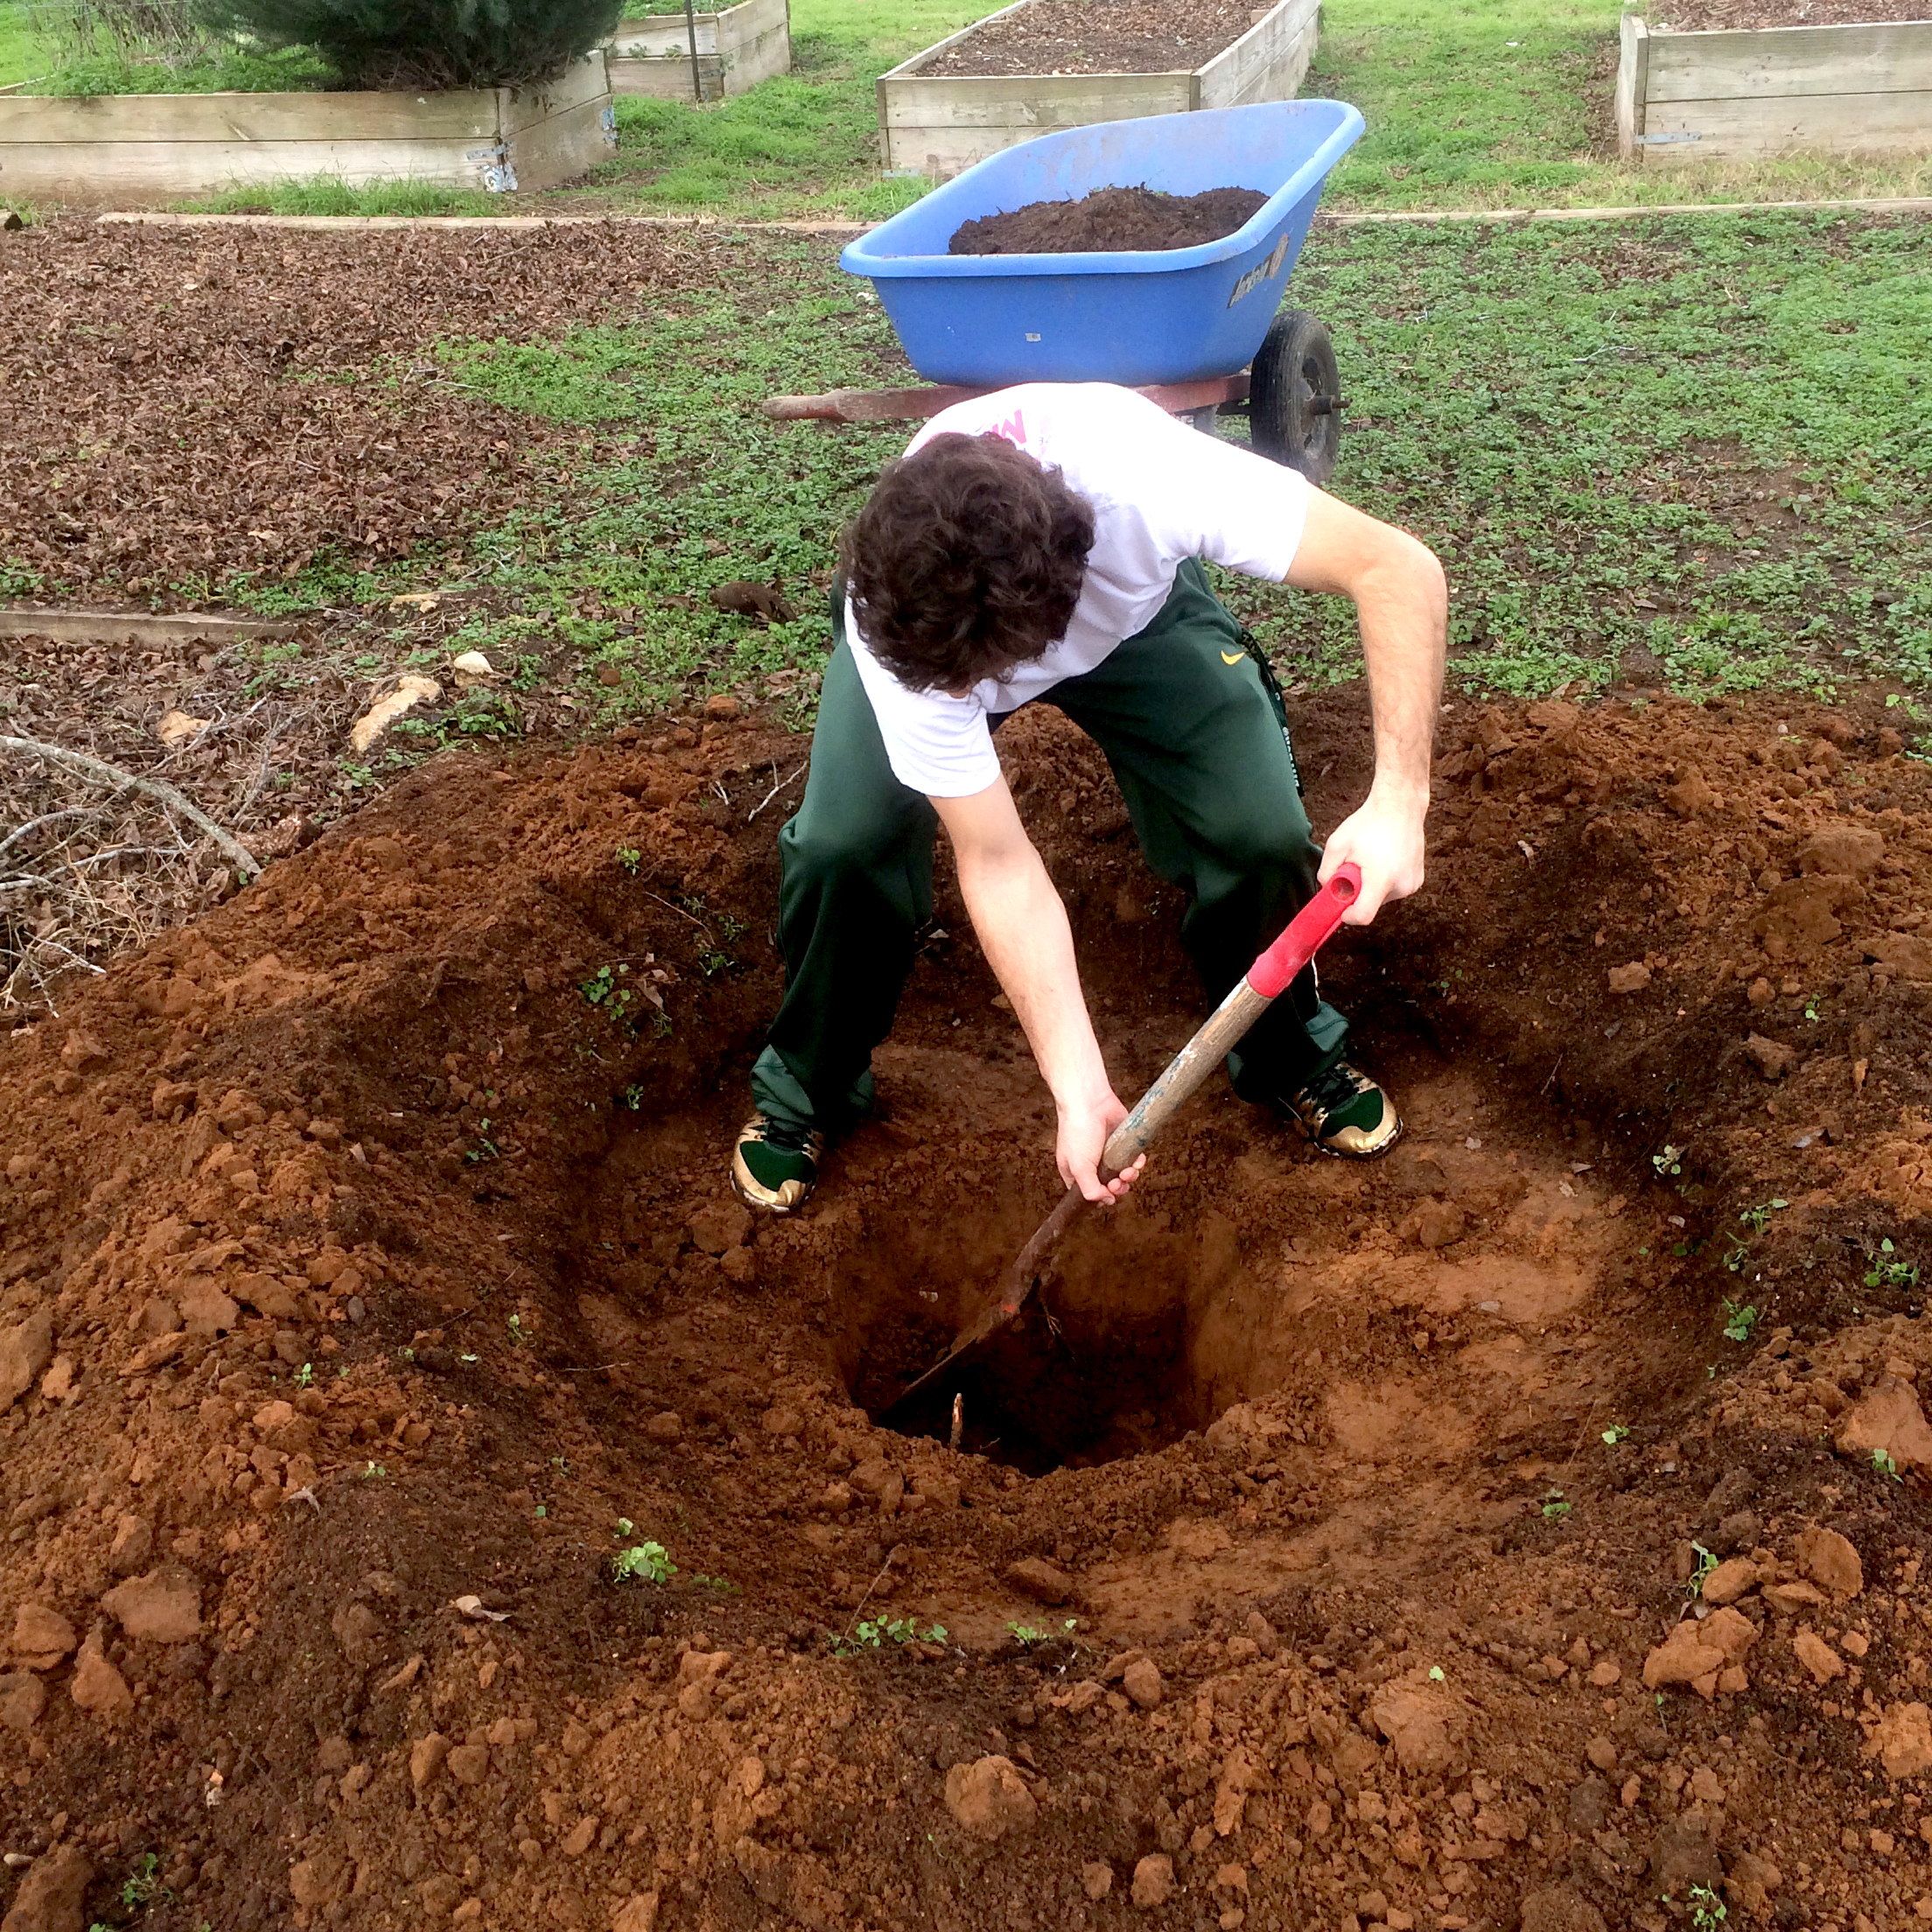
Sam and I decided to make the process simple and thought we could use the family fire pit out on the patio. It is a nice circular pit, edged in Texas limestone and situated just perfectly to watch college bowl games and tend the fire simultaneously. We simply needed it to be a bit deeper to bury the meat and veggies ala Mallman. So we start digging and about 12 inches into it we hit a PVC pipe that services the swimming pool.
What knucklehead put a PVC pipe underneath a fire pit?
Backup plan in action, we relocated the pit to Nana’s raised and currently dormant, garden. We dug and dug, finally getting a nice 3-foot deep pit.
Now we would need something large to cover up the cavity. I quickly recycled some corrugated tin panels from an old barn and used some Boy Scout ingenuity to cut them to fit. The necessary tools were unavailable.

Next, we laid down some lava rock then got a nice sized fire going. While we waited for our bed of coals to form, I threw some salt and pepper on the vegetables and both Boston butts. Then per the video’s instructions, I wrapped everything individually in foil, then again in burlap. Some craft wire held the packages together and created a nice handle for lifting and moving the bundles while hot.

Late that night, after we had burned all of our wood and had some nice smoldering coals in the pit, we spread the rest of the lava rocks on top.Next we rounded up all of our “pit parcels” and doused the outer burlap wrappings with water. The water-soaked burlap would eventually create steam inside pit and slow cook the meat and vegetables over the next 12 hours.
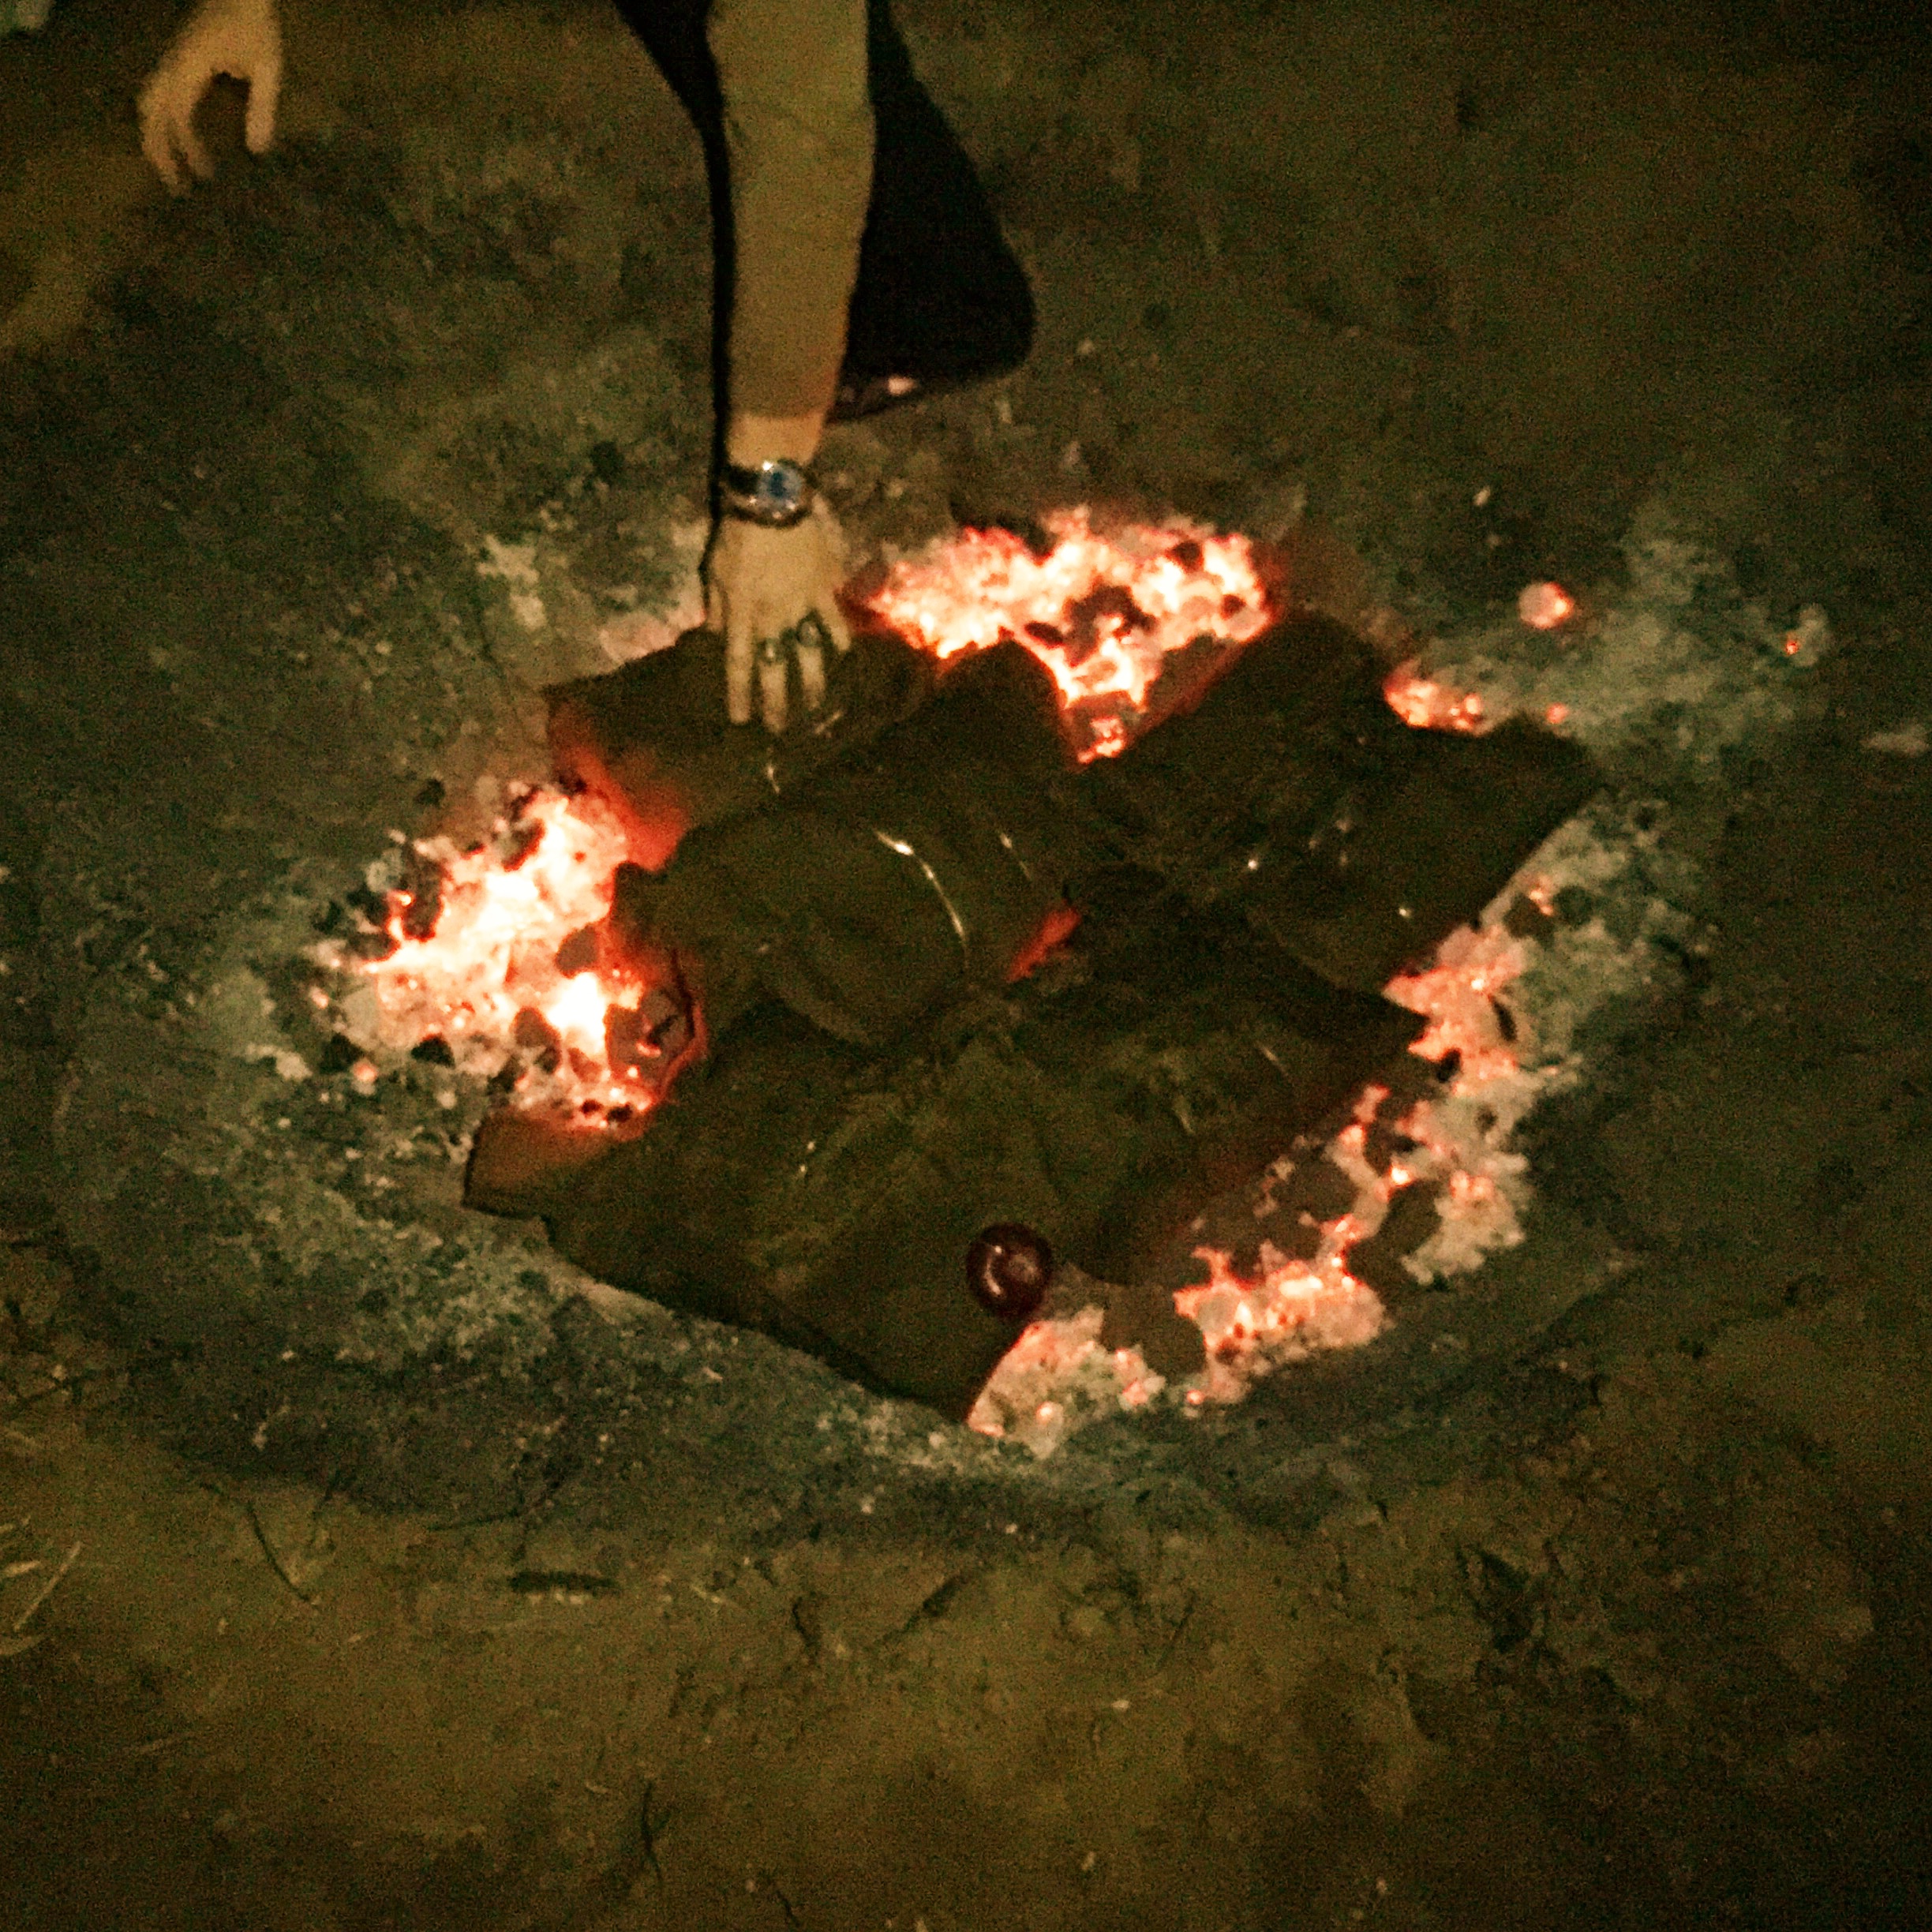
This is where things got screwy. We set the parcels upon the lava rocks and immediately covered everything with dirt, followed with the tin cover.
You probably think I’m a dumbass. I kind of thought I was too for a bit. You can imagine my disappointment the next day around noon. With the entire family standing around the pit anticipating lunch and straw-sucking potatoes, I dug everything up to find it under cooked. The dirt had completely extinguished our coals. The gathering of family, once ready to feast, now trickled back indoors to grab their car keys and head into town for lunch.
Man, I screwed up. But was I going to squander this precious pork? Absolutely not. I was gonna give it another shot.
I wasted no time getting a second fire going. A little gasoline never hurt a meat pit, right? It does burn hair, though. After careful inspection in the mirror that night, I found that I had singed not one, but both sides of my head.
Like I said, we really are pyro maniacs.
Late that night, we had a decent amount of coals. We probably needed more, but I was rushing this second attempt so I could at least have Sunday lunch ready when the Family got back from church the next day. Again, we wrapped everything up, soaked it, and put it back on the coals. Again, we covered the mouth of the pit with 3 tin panels, but this time covered the panels with dirt. This looked right. Small holes in the tin allowed steam to roll out all night.
The next morning, the Family gathered for lunch.


Recap:
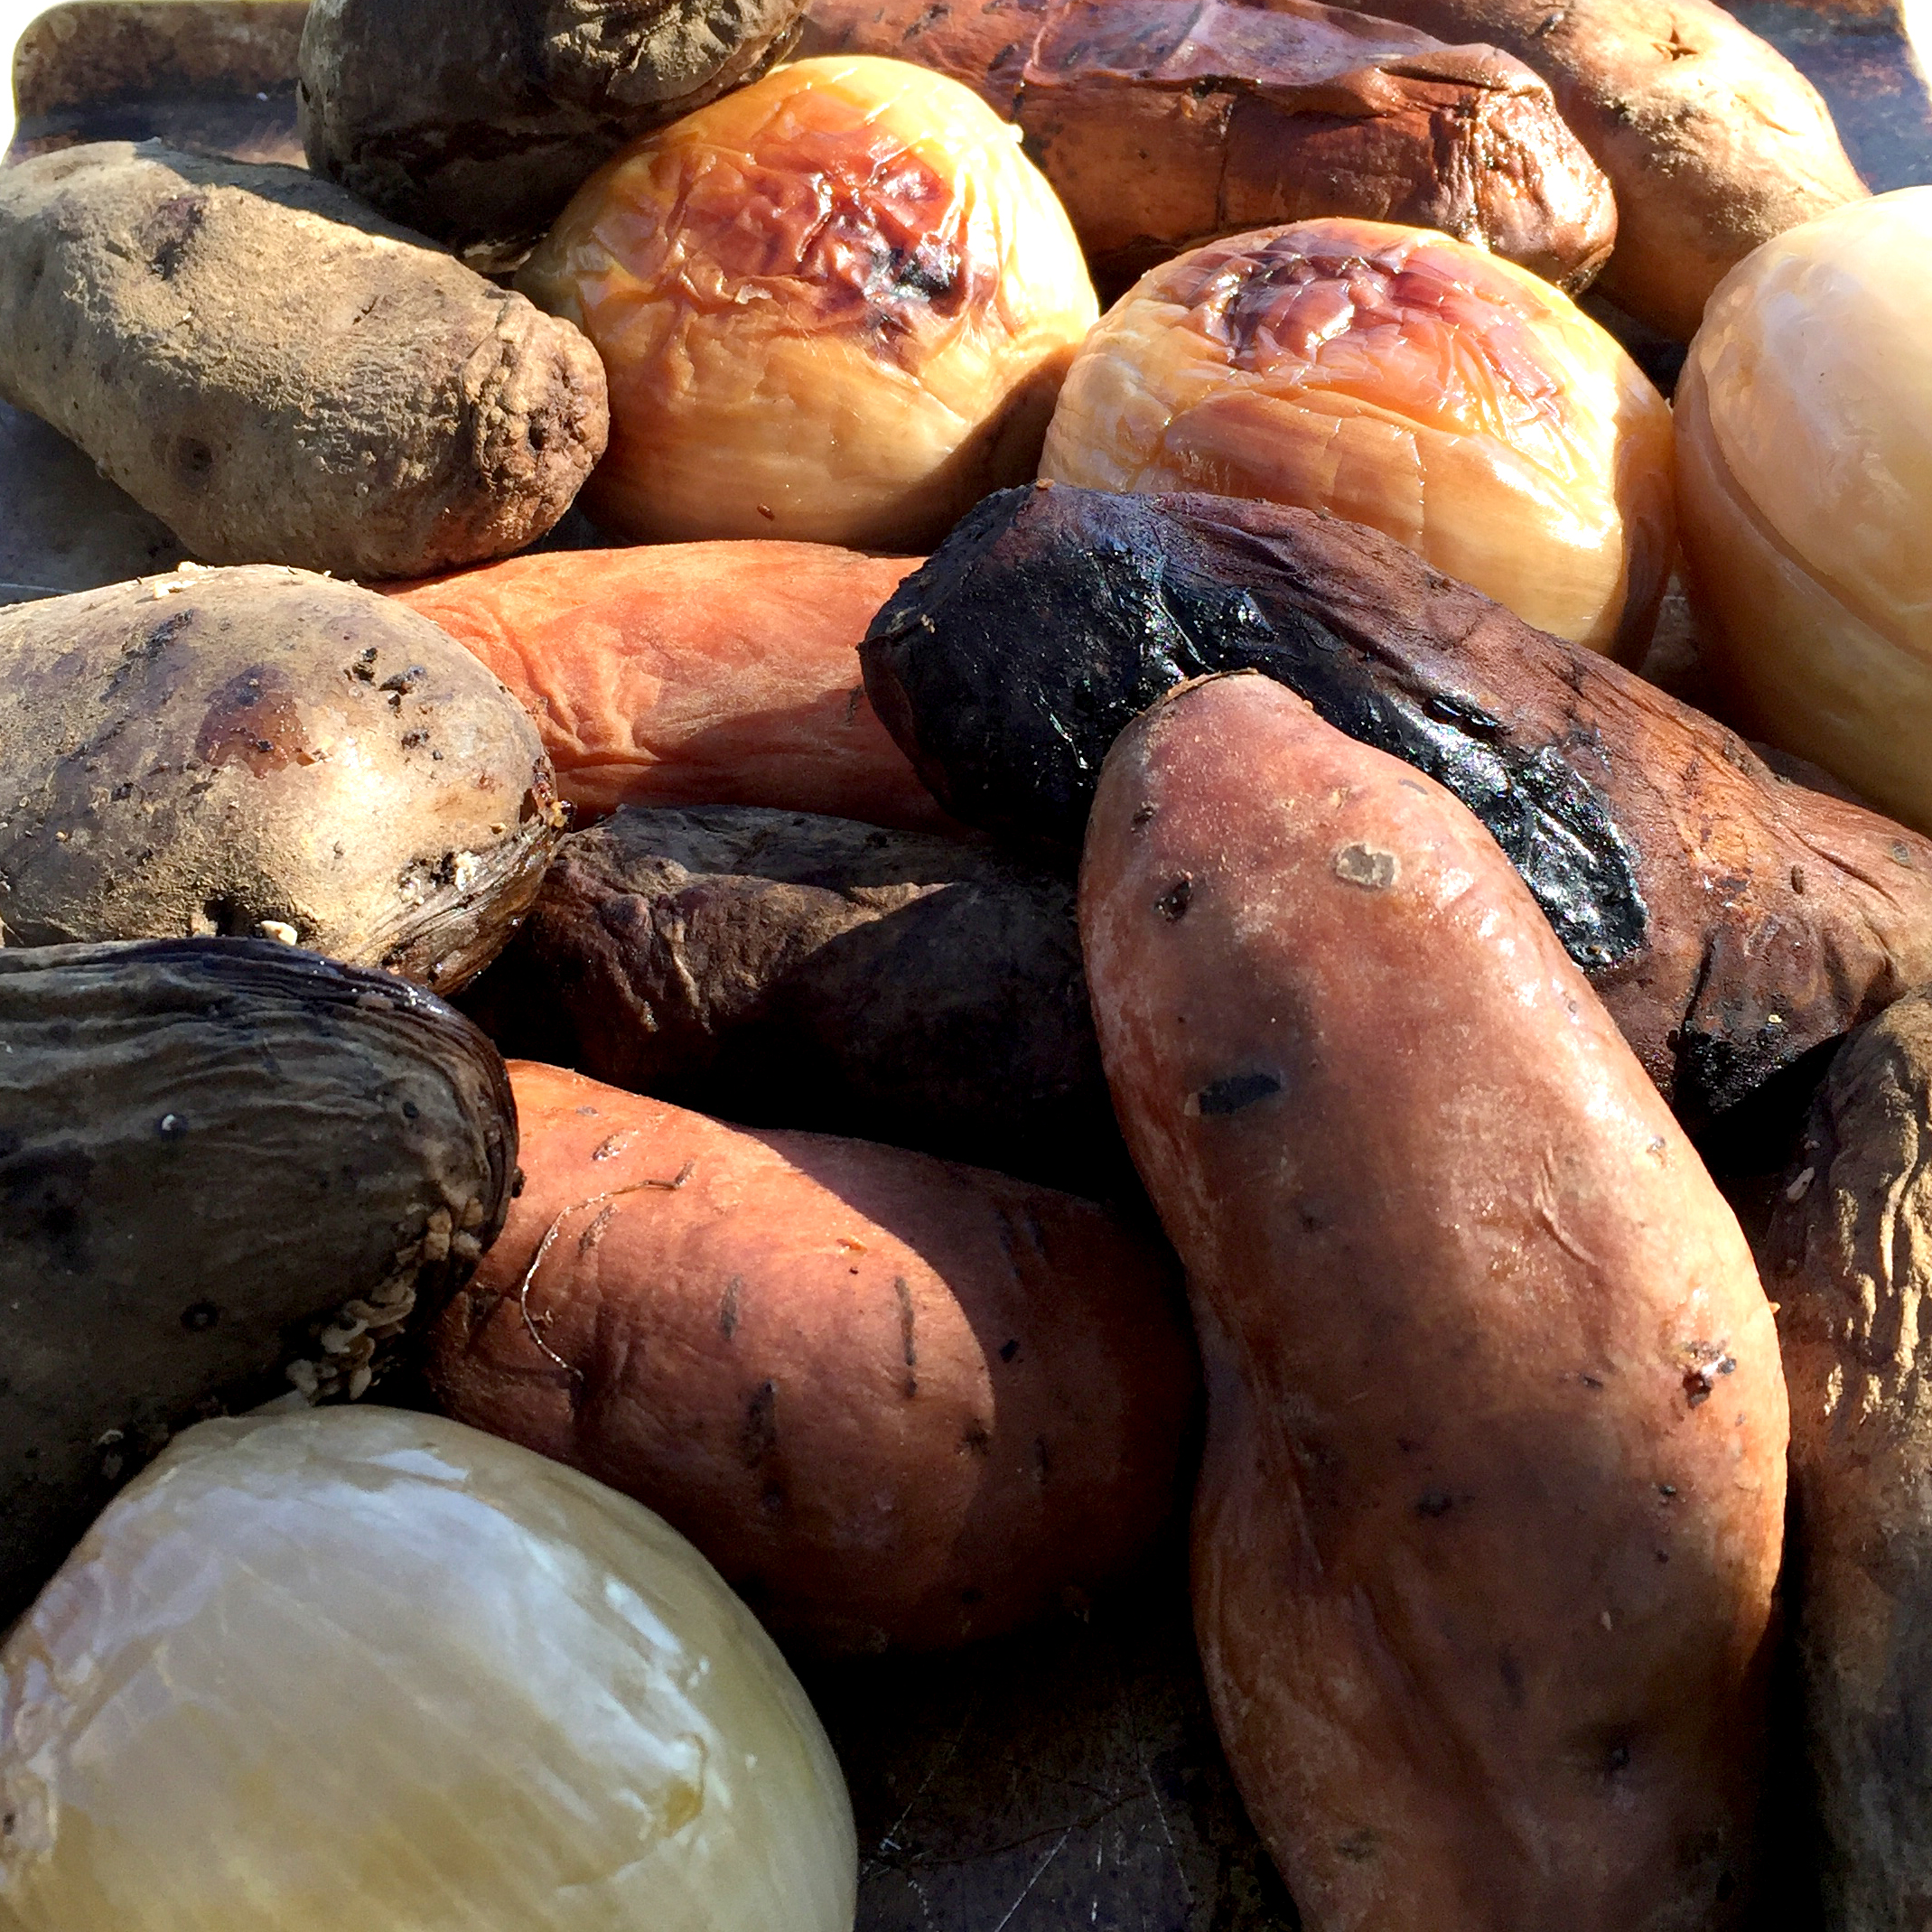
- Pork looked beautiful, but my seasoning was really weak.
- The New York pork had good flavor, but lacked seasoning as I mentioned above. It quickly got shredded and combined with some salt and brown sugar for lunchtime pulled pork sandwiches.
- Nobody touched the Texas pork. But the Sisters sure did love the flavor!
- All the potatoes were overcooked. Yes, I was deprived of the potatoes that you could suck through a straw.
Note: If you try this at home, don’t cover your meat packages and coals with dirt. The steam needs a pocket to properly cook everything.
...and hey, let me know if anyone achieves the straw-sucking potatoes. I still want to try those.
Breaking Lamb
In case you didn’t know, for the past two months I’ve been apprenticing at Fleishers Craft Butchery in Red Hook, Brooklyn. Fleishers is the best when it comes to craft butchery and locally sourced, sustainable meats. Over the course of my training, I have learned to break down whole carcass' of pigs, lambs, cattle, and poultry into their primal cuts.
Definition: A primal cut is a piece of meat, usually a muscle group, that is initially separated from the carcass in the butchery process.
There is obviously more division taking place after this initial cut, but primals are the building blocks for butchers. I'd like to share a bit of what goes into breaking down a lamb to a primal cut.
There are four main primal cuts to a lamb. Yeah, I’m sure you can find a chart on Google illustrating 15 different primals and 30 different sub-primals, but let's keep it simple with these basics:
- shoulder primal
- rib primal
- loin primal
- leg primal
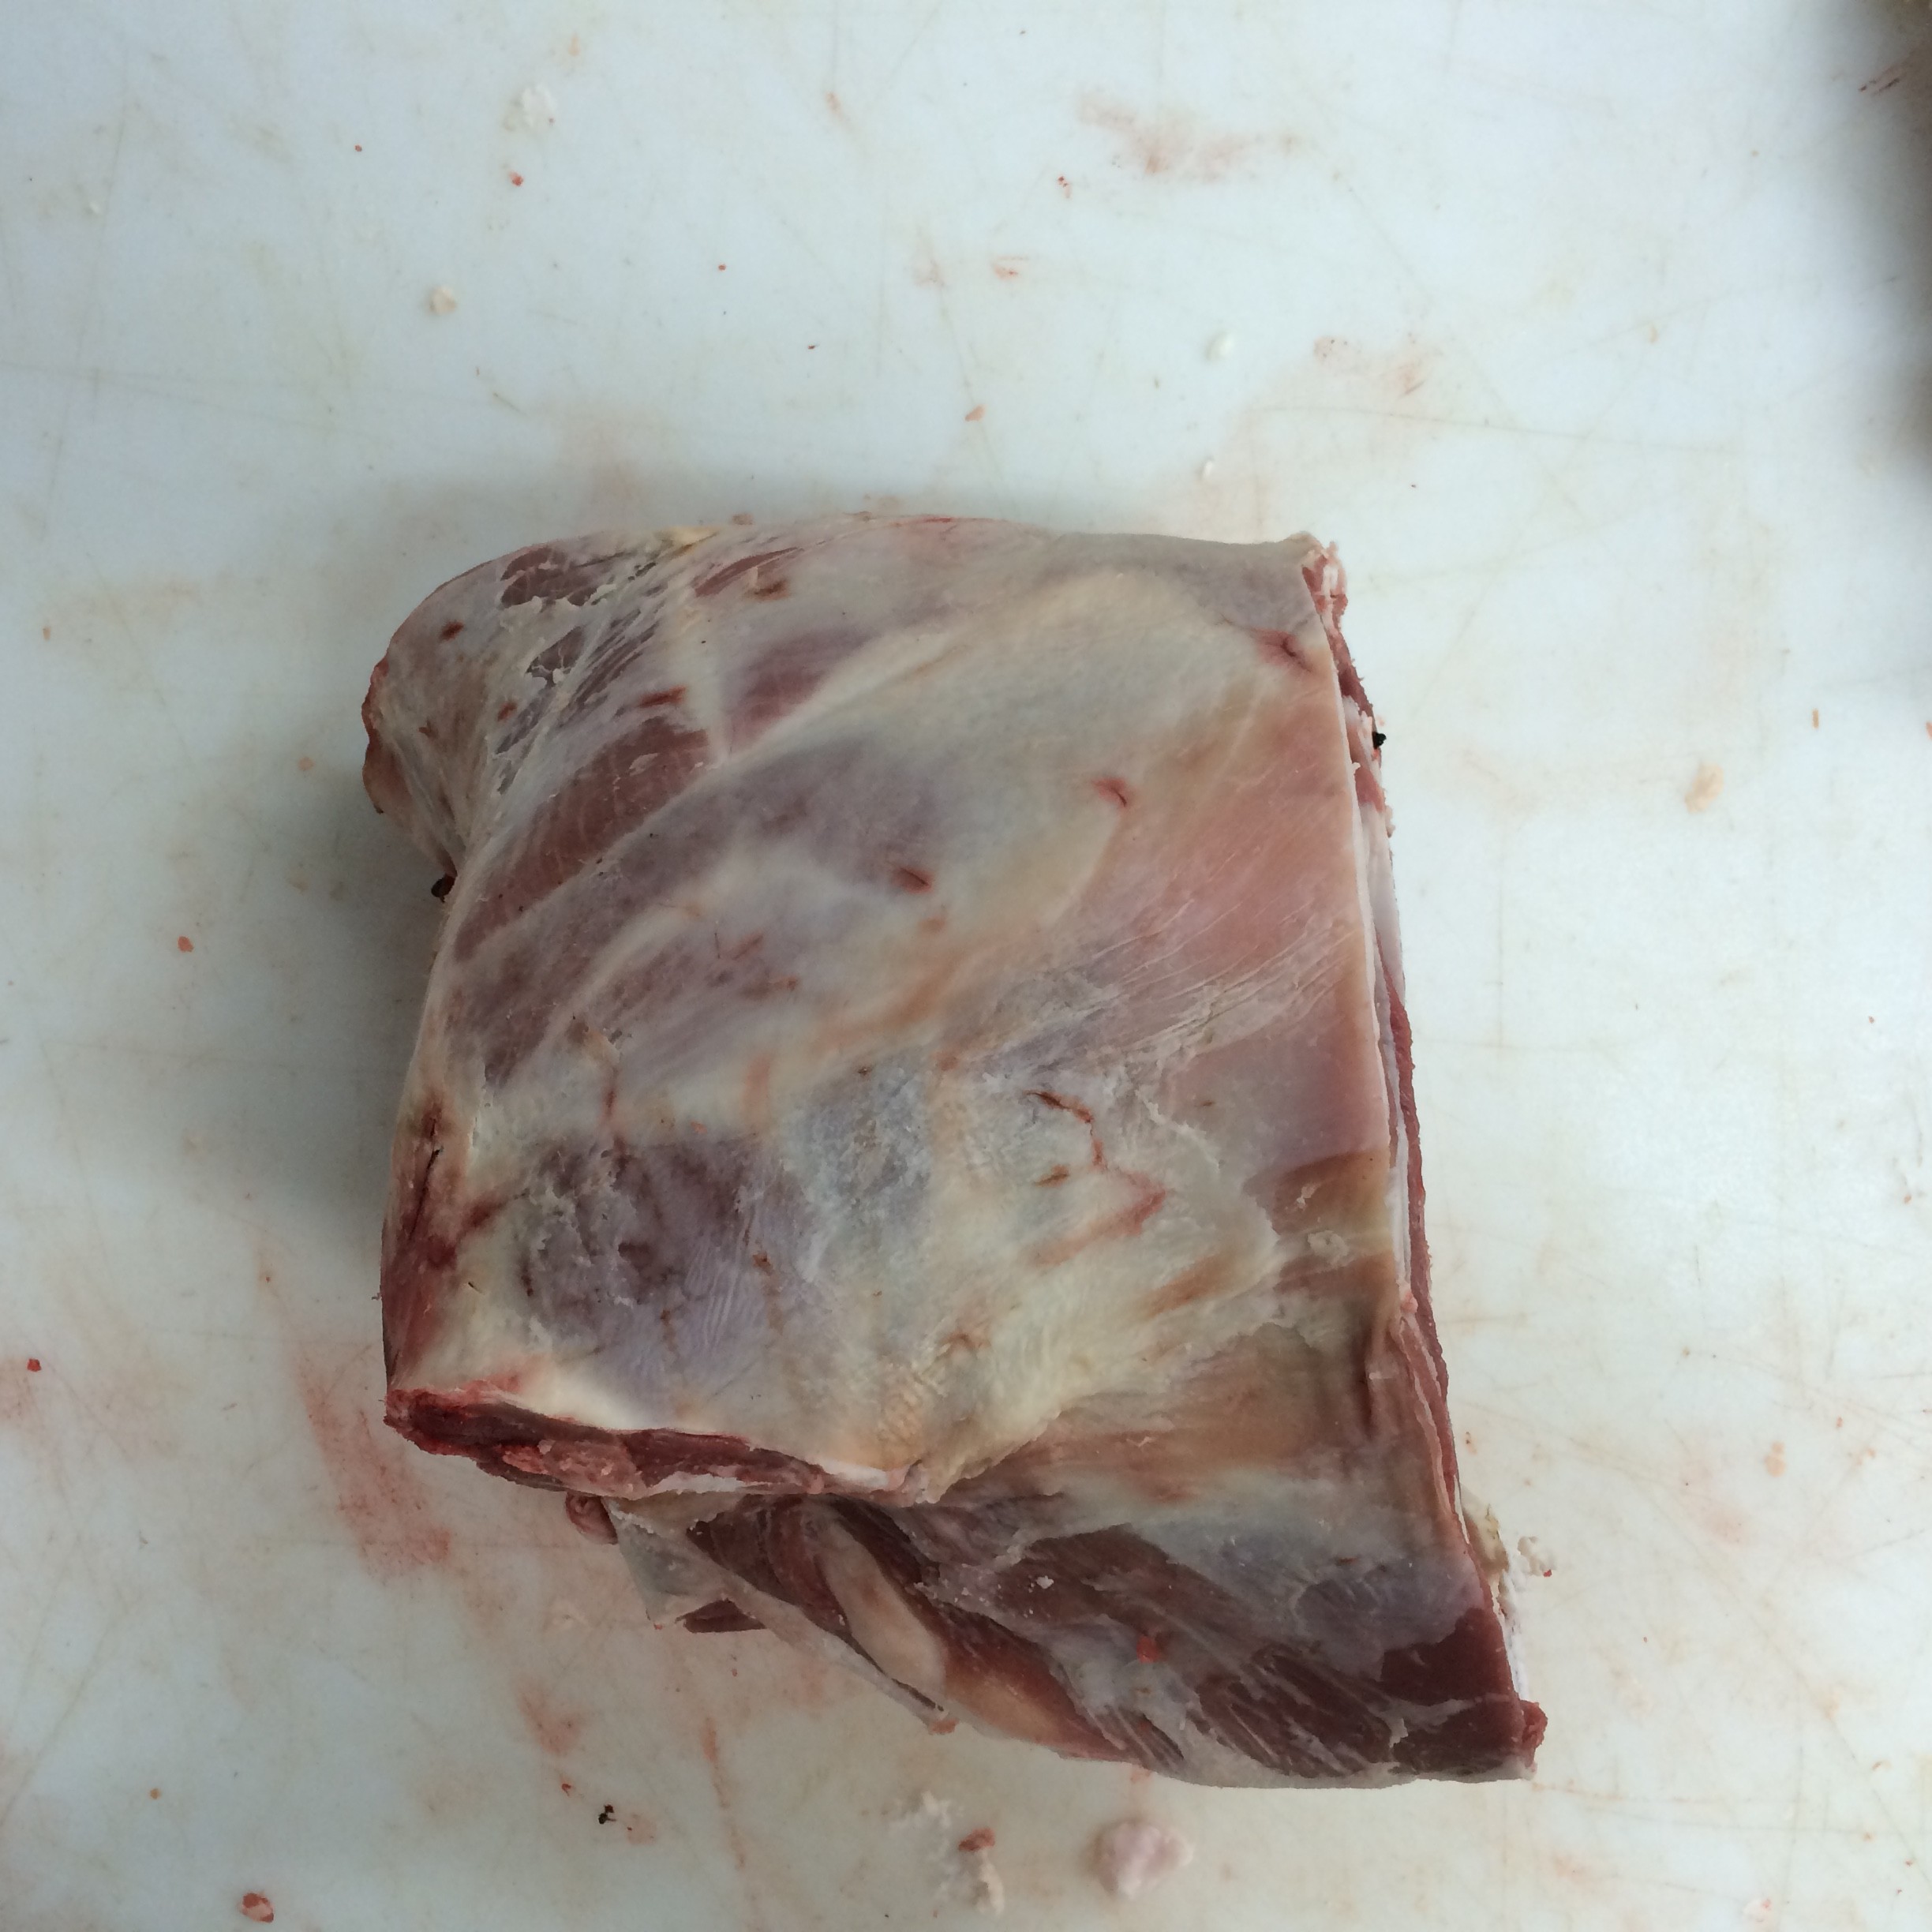
The lamb shoulder primal
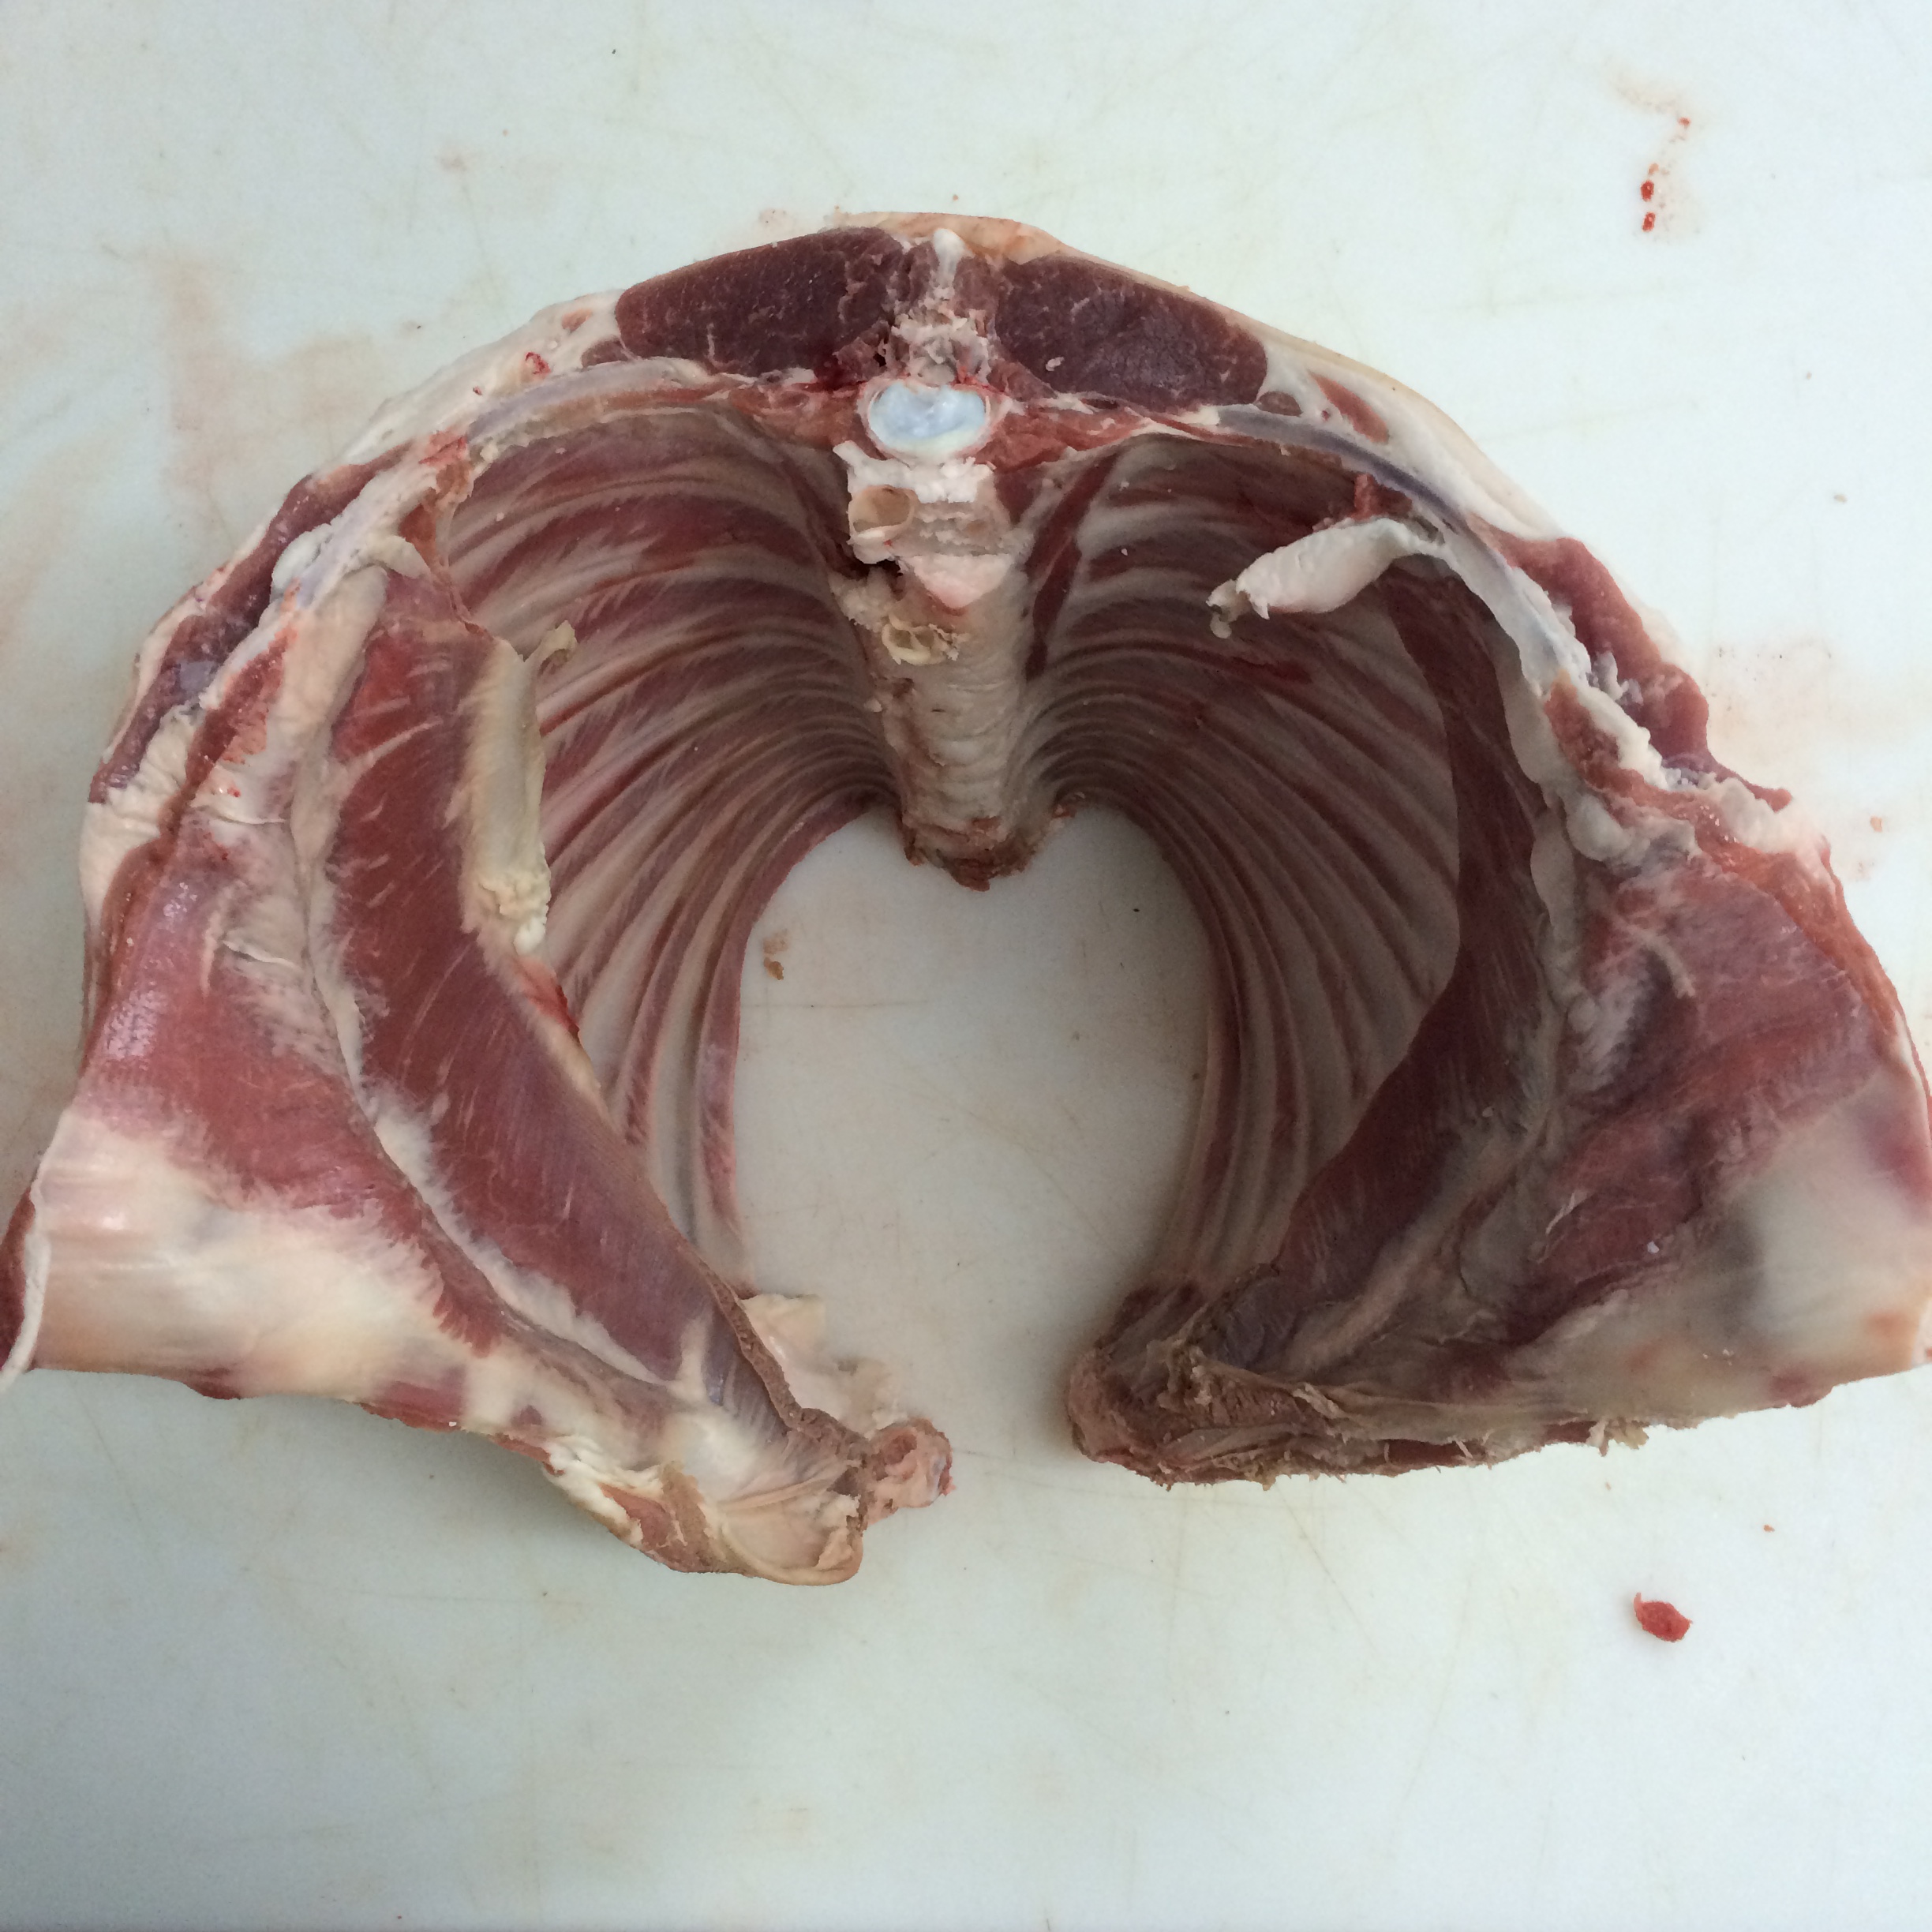
Lamb Rib primal

Lamb loin primal
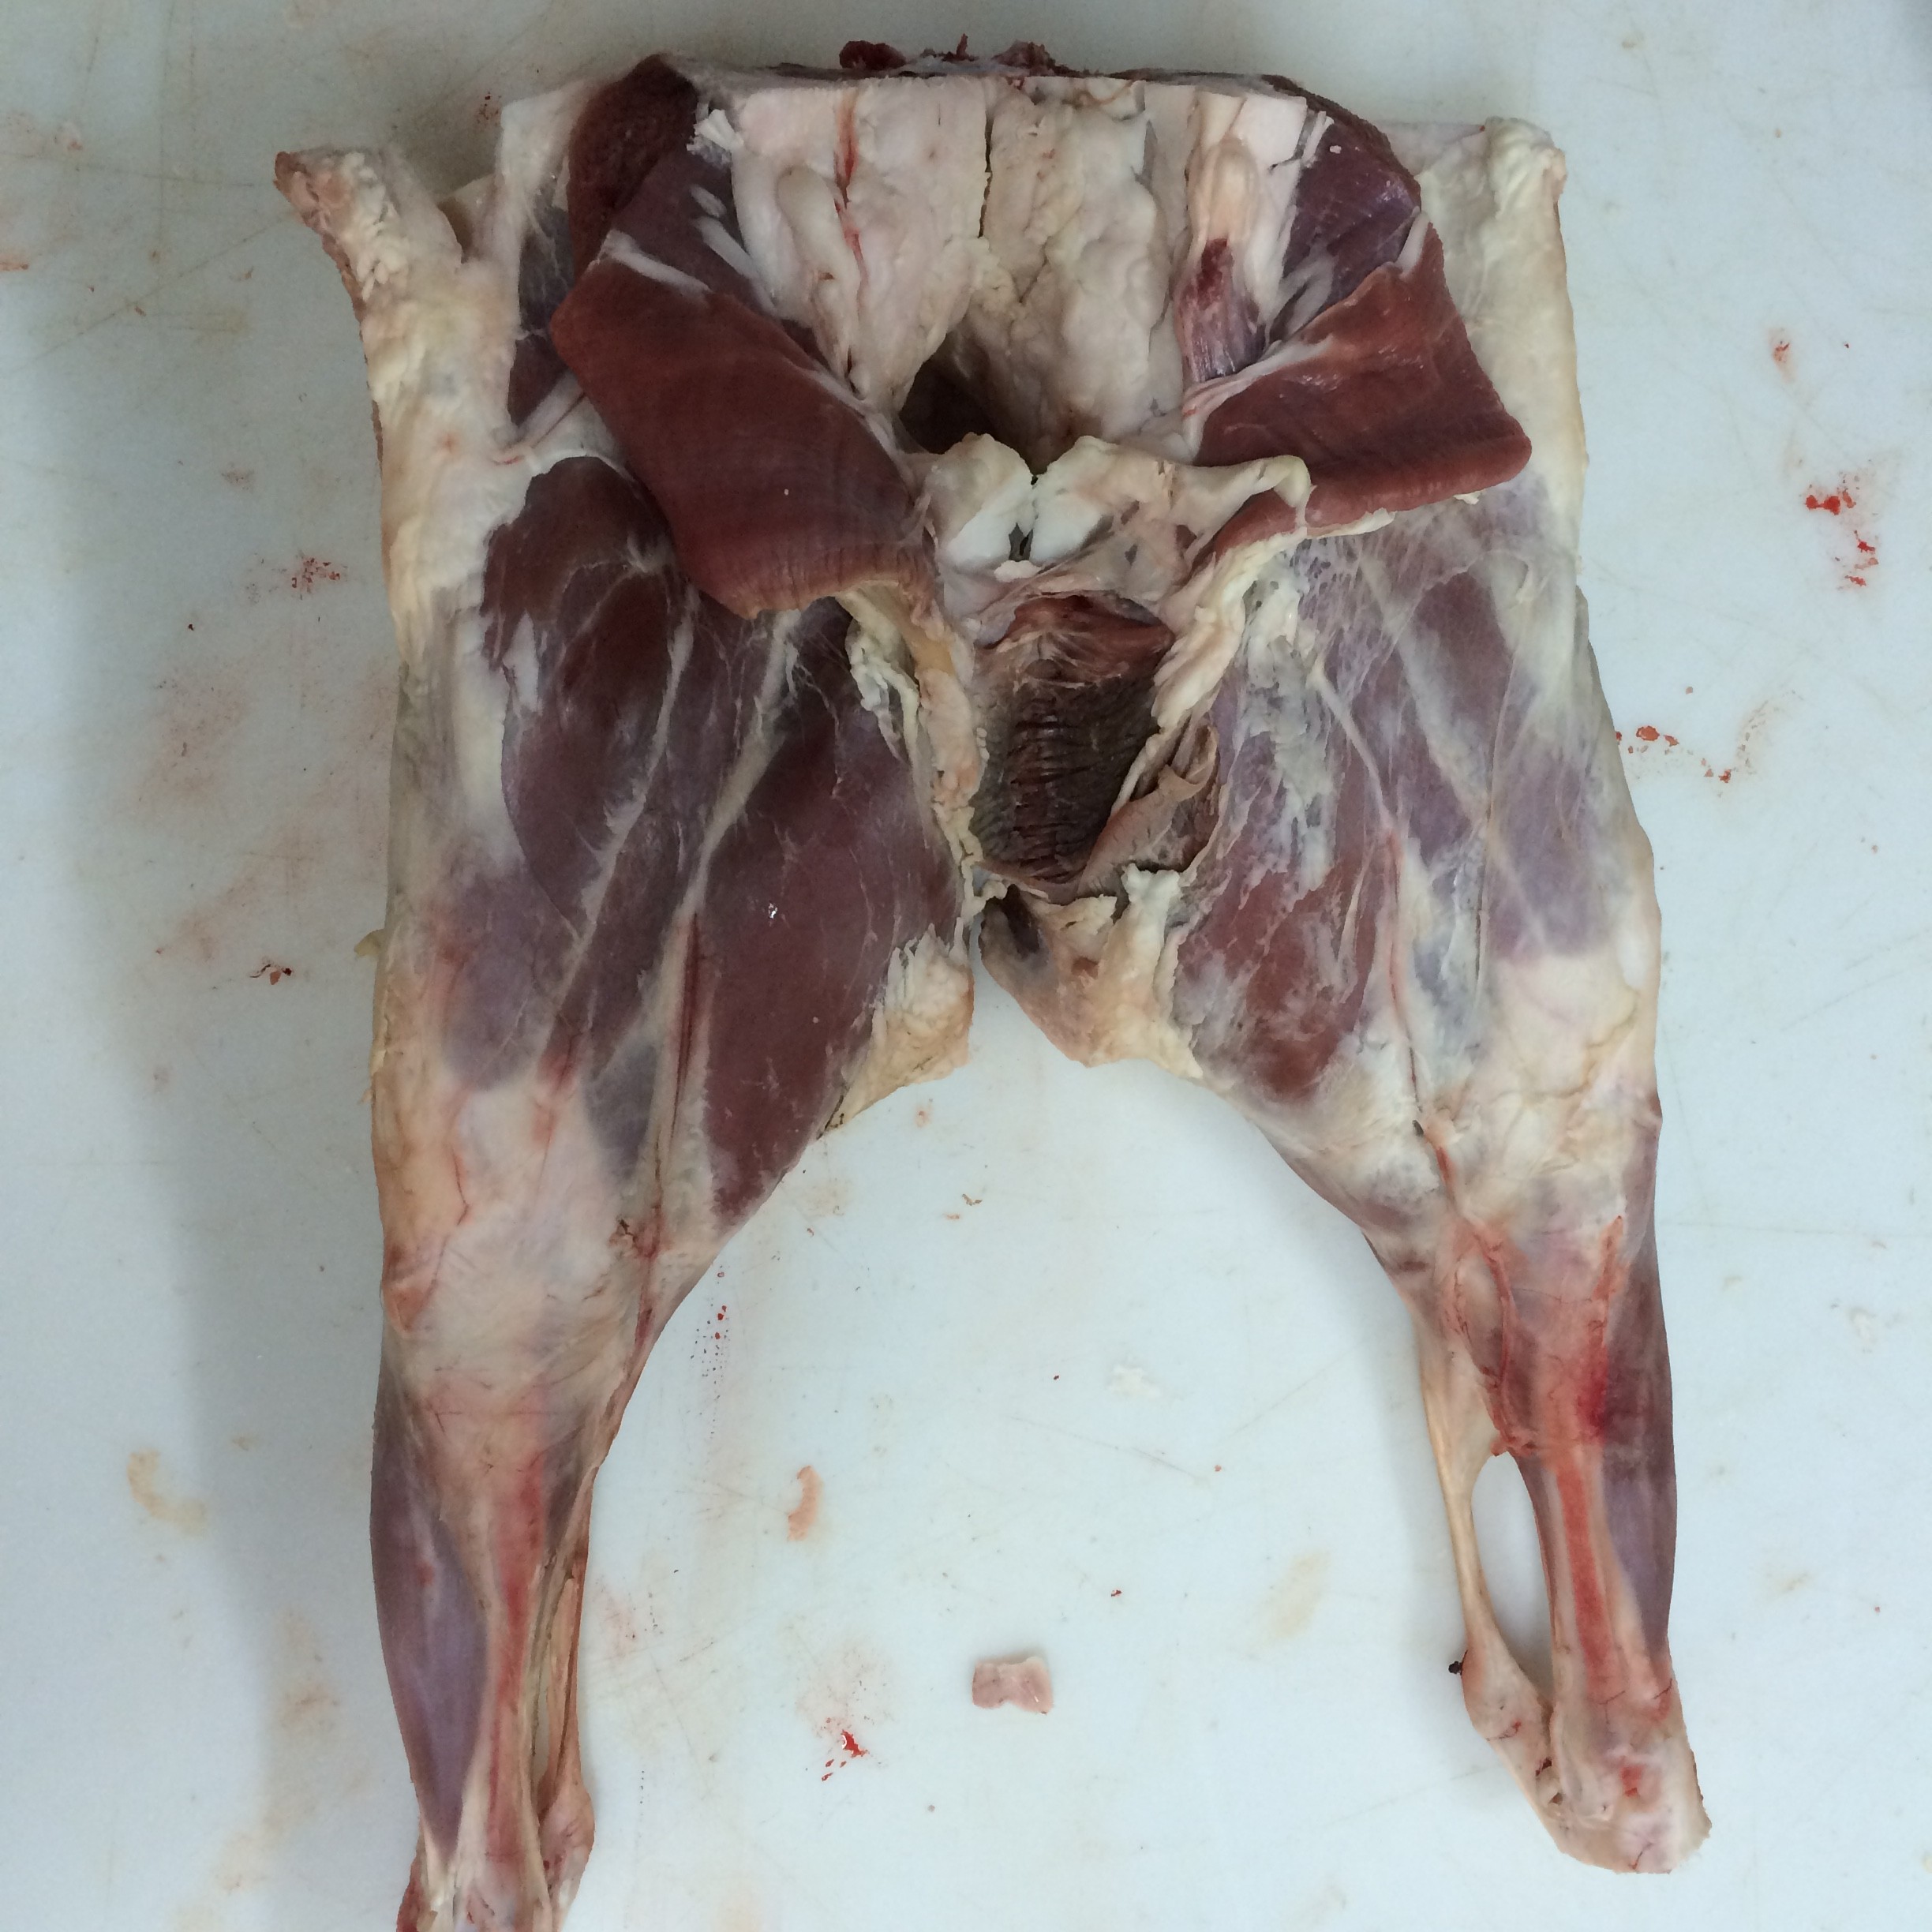
Lamb leg primal
After I’m done with a lamb, it looks a little like this...

A full lamb broken down
Oh, you see that handsaw?
Yeah, we learn the craft by doing everything old school and that includes a handsaw and muscle. As you can see in the above photo, I’ve broken this lamb carcass down into the four primals plus some extra cuts. I've also taken off the neck, fore-shanks (front legs), hind-shanks (back legs), and the spareribs.
Hopefully, you are still reading this and your head isn’t buried in a trashcan. If it is, have fun eating broccoli and carrots forever. However, if you’re dying to know more… I strapped a GoPro to my cap so you can get a bird's eye view in my Breaking Lamb video.
Breaking Pork
So I’ve told you where I am and what I’m doing, but there’s been very little about butchery on this blog; and seeing as you’re probably here to learn about meat, or because you’re my mom and you love me, I should go over some of that.
Over the 12 week hands-on program at Fleishers Craft Butcher, I will become an proficient nose-to-tail butcher. The first half of my training has been taking place at the Fleishers' processing facility where we take a whole animal carcass and break it down into smaller primal and sub-primal cuts.
Still not following?
Well, you are in luck because I got my hands on some camera equipment…
-
May 2022
- May 24, 2022 The Hand House May 24, 2022
-
May 2018
- May 16, 2018 Texas, Arizona, and Peru May 16, 2018
-
March 2018
- Mar 6, 2018 Bucket List Mar 6, 2018
-
February 2018
- Feb 19, 2018 OSSO Feb 19, 2018
- Feb 7, 2018 Pass the Cheese, Please. Feb 7, 2018
-
January 2018
- Jan 7, 2018 The Unofficial World Hot Dog Championship Jan 7, 2018
- Jan 2, 2018 Haven Festival Jan 2, 2018
-
November 2017
- Nov 20, 2017 We Are What We Eat Nov 20, 2017
- Nov 1, 2017 License to Kill - a Way of Art Nov 1, 2017
-
October 2017
- Oct 21, 2017 Fleischer-Handwerk Oct 21, 2017
- Oct 18, 2017 Mad Food with Mads Cortsen Oct 18, 2017
-
August 2017
- Aug 14, 2017 Roskilde Festival Aug 14, 2017
- Aug 2, 2017 The Proof That Even Slaughterers Can Become Pop Stars Today Aug 2, 2017
-
June 2017
- Jun 6, 2017 Where to Find Pig Ear Terrines, Spicy Nduja and Other Adventurous Charcuterie in Dallas Jun 6, 2017
- Jun 5, 2017 Cochon555 Houston Jun 5, 2017
-
May 2017
- May 23, 2017 Charcuterie Masters 2017 May 23, 2017
- May 18, 2017 Dirty Steaks May 18, 2017
- May 16, 2017 Dîner en Blanc May 16, 2017
- May 10, 2017 Steensgaard May 10, 2017
-
April 2017
- Apr 4, 2017 Gascon Fricandeaux Apr 4, 2017
- Apr 3, 2017 American Kid Apr 3, 2017
-
March 2017
- Mar 27, 2017 Folkets Madhus Mar 27, 2017
- Mar 23, 2017 Another Open Door Mar 23, 2017
- Mar 13, 2017 Yoakum Man Learns Old World Butchery Mar 13, 2017
-
February 2017
- Feb 20, 2017 Great Day Houston Feb 20, 2017
-
December 2016
- Dec 4, 2016 Creating the Manifesto Dec 4, 2016
- Dec 4, 2016 Meating Fellow Revolutionaries Dec 4, 2016
- Dec 4, 2016 The Butchers' Manifesto Origins Dec 4, 2016
-
November 2016
- Nov 10, 2016 The Sausage Man Never Sleeps Nov 10, 2016
-
October 2016
- Oct 19, 2016 Road Trippin' Across Europe Oct 19, 2016
- Oct 2, 2016 Vide Greniers: the French Garage Sale Oct 2, 2016
-
September 2016
- Sep 20, 2016 Je N'ai Plus Faim Sep 20, 2016
- Sep 13, 2016 Noix de Jambon Sep 13, 2016
-
August 2016
- Aug 28, 2016 The Chapolard Family of Gascony Aug 28, 2016
- Aug 7, 2016 The Cowboy, the Expat, and the Englishman Aug 7, 2016
-
July 2016
- Jul 31, 2016 France - Right Where I Need to Be Jul 31, 2016
- Jul 25, 2016 Fambam in Italy Jul 25, 2016
- Jul 11, 2016 Red is His Signature Color Jul 11, 2016
- Jul 4, 2016 Doin' It Like Dario Jul 4, 2016
-
June 2016
- Jun 19, 2016 Trouble in Paradise Jun 19, 2016
- Jun 8, 2016 Tex-Mex Night in Italy Jun 8, 2016
-
May 2016
- May 29, 2016 The King of Beef Does Porchetta May 29, 2016
- May 12, 2016 It's a Long Way to the Top May 12, 2016
- May 10, 2016 Viva La Cicca! May 10, 2016
- May 1, 2016 It’s Crazy What Can Happen in a Year May 1, 2016
-
April 2016
- Apr 26, 2016 The Kitchen at Camont and the Art of Charcuterie Apr 26, 2016
- Apr 12, 2016 Keeping It Under My Hat Apr 12, 2016
- Apr 3, 2016 Let Them Eat Cake Apr 3, 2016
-
March 2016
- Mar 22, 2016 Kolaches versus Klobasniky Mar 22, 2016
- Mar 3, 2016 The Queue for some sweet 'Cue Mar 3, 2016
-
February 2016
- Feb 21, 2016 POS Meat Grinders Feb 21, 2016
-
January 2016
- Jan 21, 2016 Earth Oven Tragedy Jan 21, 2016
- Jan 17, 2016 This ‘ol Gal is Smoking Hot Jan 17, 2016
- Jan 12, 2016 The Gringo and la Reina Tamal Jan 12, 2016
- Jan 7, 2016 Packin' Pork Jan 7, 2016
-
December 2015
- Dec 23, 2015 Empire State of Mind Dec 23, 2015
- Dec 10, 2015 Meat Monger Dec 10, 2015
-
November 2015
- Nov 23, 2015 Jerky Game Strong Nov 23, 2015
- Nov 11, 2015 Breaking Lamb Nov 11, 2015
- Nov 1, 2015 Breaking Pork Nov 1, 2015
-
October 2015
- Oct 26, 2015 Like Cocaine in the '80's Oct 26, 2015
- Oct 21, 2015 Fleishers Craft Butchery: Day 1 Oct 21, 2015
- Oct 11, 2015 Year of the Cow Oct 11, 2015
- Oct 4, 2015 13th Step to Manhattan Oct 4, 2015
-
September 2015
- Sep 27, 2015 Brooklyn Cowboy Sep 27, 2015
- Sep 27, 2015 Vaya con Dios Sep 27, 2015
- Sep 14, 2015 Mystic Goat Roper Sep 14, 2015
- Sep 10, 2015 Green-hand Gringo Sep 10, 2015
- Sep 10, 2015 Shell Station Burgers Sep 10, 2015
- Sep 10, 2015 Butter 'Em Up Sep 10, 2015
- Sep 10, 2015 Why The Hell Not? Sep 10, 2015